Sunday, September 30, 2012

Craft Book Challenge entry :)

Craft Buds is hosting a craft book challenge this month - we're to choose a project from any craft book - and make it!  Most crafters will understand why there might be a need to be challenged to actually get around to using our books instead of just perusing them *ahem* :D

Here's what I made for the challenge - this is an Origami Bag Set from Amy Butler's book "Style Stitches" :)  The book has instructions for 6 sizes, and I chose to do the 3 smallest -- a mini, a small, and a medium.  They're plenty big, so I'm glad those were the sizes I chose!  I pretty much made the bags according to her instructions, although as usual, I cut out the boxed corners instead of folding the corner to a point.  I'm very happy with how they turned out!  I think I'll tuck them in my gift box - you never know when a pretty little bag set might brighten someone's day :)

Amy Butler's Origami Bag set for the Craft Book Challenge :)

Large bag 13.5w x 6t x 2.5d

Medium bag 12w  x 4.5t x 2.5d

Small bag 10.5w x 4t x 2w

And now - if you'll excuse me, I'm off to check out the other projects posted - I've already been peeking and I see some adorable goodies!  BTW - the bench that I photographed the bags on, is a bench I made about 17 or 18 years ago for our front porch - it has sat out there winter and summer since then, and we still use it!

ETA:  Entered into the Purse Week 2012 challenge Oct. 4/12 :)

Saturday, September 29, 2012

Corduroy and yoyos :)

Here's a quick little bag I completed the other day - it's from Pretty Little Purses and Pouches by Lark Books - it's called Yo Chica (what a dreadful name, lol) but I just call it the corduroy bag with the yoyos :D  It was easy, and quite fast to whip up! 

Thursday, September 27, 2012

Bats in my belfry :D

 Here's a little (6.5" tall x 12.5" wide) bat stuffy I made for *someone who shall remain nameless until the parcel arrives* :D

Construction notes:  I enlarged the pattern by 50% (original was too small for my cranky fingers), and added batting to the wings to make it stuffier :)

 I've already posted the basket and mentioned who it's for, but no sleuthing allowed.  Here's part of the little package I sent off today ;)  Batty fits nicely into the basket, lol.
Here we have the belfry part - I wasn't paying attention when I made this bag and put the zipper on the wrong end of the fabric.  OOPS!  Will do better next time - I want to make a few little zipper bags for the neighbours kids who will be coming by on Halloween night :)

Wednesday, September 26, 2012

We're gonna need a bigger shrimp!


ROTFL!!!

Thanksgiving turkey :D


A certain little someone LLish will be celebrating his first Thanksgiving early next month - he obviously needs Thanksgiving bib and tucker to celebrate in :)


I already have the bib made, so here's the tucker!  I measured my neighbour's 13 month old lad to see how big to make the tie - thanks for being a good sport, Marco!!  And congratulations on learning to walk to mommy while I was there, woooooohoooooooo!!  YOU GO BOY!  :)

Tuesday, September 25, 2012

BOO!! In plenty of time to trick or treat!

 Here's a little gifty I completed for g-nephew Lleyton --- it's a trick or treat basket for his first Halloween, LOL.  He'll be 10 months old so he won't be getting candy, but I bet he'll be getting other kind of goodies :D  I combined two patterns to make this --- the patchwork aspect is from Pink Penguin's fabric basket, and the sizing/design is from Pam @ Threading my Way :) Finished size = 3.5" deep x 7.5" wide x 5.5" tall.  The top could be folded over instead of using handles (see Pam's project) - it's a great size :)

Here's a close-up of the Shrinky Dink name tag I added to the bag, just so everyone will be clear whose bag this is, LOL!!

My construction notes:
- patchwork = 2.5" x 4" strips (6 each of 2 prints)
- centre piece = 11 3/8" x 8 1/2" (rough cut to 12 x 9, then trim down to size)
- 3/8" seam allowances, but 1/2" at top to close the opening (I like to leave the turning RSO opening on the top edge instead of in the bottom or a side of the lining)
- 2 straps @ 3.5" x 9"
- cut boxes 1.5" from seam


I was going to enter the challenge ...

I actually completed my item for the challenge, a few days ahead of schedule :)  When I reread all the must do's, though, I decided that it was more of a time commitment than I'm interested in - I don't particularly like to "promote" and chat about the challenge - I like to do my project, enter it, and then check out the other entries at the end.  I certainly wouldn't blog and ask people to vote for me.  Nevair!! 

Here are my completed bags - the pattern is from ithinksew, and is called, appropriately, Pleated Pouches :D 

I've bought several of her patterns over the last year or two, and she also has freebies on her site for members (you just need to sign up) - she has cute stuff!  NAYY :)

ETA:  Entered into the Purse Week Challenge Oct. 4/12 :)

Monday, September 24, 2012

Owl have to post a picture ...

Oi vay that was pretty low as far as punny blog post titles goes, sheesh!!  ;)

 Here's a gift bag (tall pouch) that I made on the weekend - it's for my sister to use when she gives gifties to her favourite (and only, so far!) grandson :D  I'm doing a few other bags in different sizes as I expect she won't only be giving him small gifts :D  I wonder how much fabric you need to make a car sized bag?  ;)
 
I made a little tag for it with Shrinky Dink - next time I won't do such a close-up - my printing is terrible!

Saturday, September 22, 2012

Pellon Vinyl Fuse - lessons learned :D

A while ago I pinned a project that used an iron-on vinyl coating on candy bags to make zipper bags.  Loved the idea, and despite many Buffalo Joanns employees telling me they don't carry iron-on vinyl, they do, and I bought some (60% off of the $10 price - YAY!) :) Today I got around to trying the bag.  Lessons were learned, and I *will* try again, because I think it's a darn cute project - so much fun for a bag for kids!  (Sorry about the glare in my photos - the photos were taken in the basement)

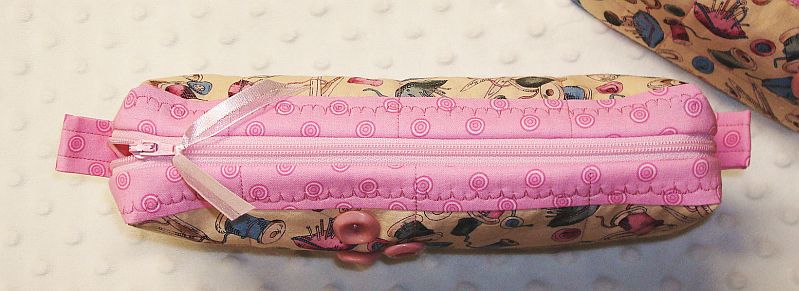
Here's mine - DON'T LAUGH! 
Lessons learned:

1.  Pellon thoughtfully TAPES the roll of vinyl closed in the box.  That allowed me to rip a hole in it when trying to remove the tape.  Thanks, Pellon, for not using - oh - say - an elastic that wouldn't LEAVE HOLES!  Lesson learned - either spend 25 minutes carefully removing a small slice of invisible to the eye clear tape from clear vinyl, or expect to lose several inches of vinyl.

2.  Don't use high heat when ironing this.  I always use the cotton setting and that's what my iron was set at when I did the first press - this is the result, LOL.  Definitely my fault, not Pellons.  Medium heat worked perfectly!

3.  Don't trim down your "good" piece (whatever it is you're covering) before vinyling it.  It's easier to rough cut the outside and the vinyl and then after ironing, trim down to size.  Cut the vinyl about an inch bigger than the piece you're covering (i.e. 7x9 outer fabric, 8x10 vinyl, trim to 6.5 X 8.5 after vinyl is applied).  Yes, this creates a bit of waste, but it makes life easier not to have to finagle.

4.  The vinyl is actually very easy to handle after you remove the paper backing - I had been worried it would be difficult to use, but it wasn't.

5.  Don't use clear plastic for your outer piece - I didn't think that through and didn't realize that the innards of my bag would be totally visible (and hideous) from the outside, LOL.  You can see the wrong side of the lining fabric - YIKES!

6.  Don't use a crochet hook to try to poke out the sides of the bag to make them nice and straight.  You'll poke a hole in the vinyl.  Ask me how I know this :D  Use your fingers or be VERY gentle - it's not possible, I don't think, to get perfect straight edges and pokeouts, but do your best and then don't worry.

7.  Don't use a piece of the backing paper to cover your ironing board to protect it from the vinyl - it'll stick to the project and will NEVER COME OFF.   Ask me how I learned THAT as well!!  :D


The hardest part of this project was turning the bag right sides out after all the seams were stitched - that just about made me crazy!  Persevere, and all will come out in the end.  It'll be a bit rumpled, but it'll work :)  Make sure you poke out the sides/corners as best you can, before stitching the opening in the lining closed.   You'd think I would know that, but no, I had to rip out a few inches to do the last poking *insert wry grimace here* :D 

Do a trial run and learn how the product works - it's really not that difficult to work with (despite my many faux pas') and done properly, should give you a cute project.  I don't think the outside can look crisp and 100% perfect, but it'll still be cute.

I need to find some pretty candy wrappers now - do you think my kids would mind helping with that? LOL!

Airplanes for Knox :)

Fabric airplanes - tutorial here :)
These are a "just because" gift for the grandchildren of a neighbour/friend -- Princess Grandma :D  The 3 year old lad gets the airplanes, and his almost 1 year old sister gets a set of bibs I made recently (the set consists of a Halloween and a Thanksgiving bib).  More airplanes to follow, as I have another 3 or 4 sets cut out, lol!

Friday, September 21, 2012

Snowmen and bags - ALWAYS bags! ;)


Snowman bibs, backed with red snowflake fleece :)

2 knitting bags

2 boxy bags

Boxy bag from the top - long, skinny and narrow!
The other boxy bag from the top - a bit wider, a bit skinnier, but silt narrow :)


Tuesday, September 18, 2012

Using up bits and pieces :)

Here are some recent finishes - some will be going to Blue Hills, some are going into my gift box. Most of them were made to use up the last bits and pieces of fabric from stash :D  Sadly, despite the multiple completions, not much of a stash dent is evident ;)

Owl tall pouches :)

Monster bibs using up bits and pieces of flannel :)

An assortment of zipper bags and a flex frame eyeglass case :)
Tall pouch and zipper bag :)
I've linked to the tutorials for the monster bibs and eyeglass case :)  I quite like the eyeglass case - it worked out perfectly, and is just right for regular glasses (my sunglasses are too big for this case).  I've ordered more flex frames from my lovely Etsy seller, Tania, in Portugal :D

Construction notes for eyeglass case:
Cut - 2 x 4.5" x 7" lining, 2 x 5 x 7.5" outer - quilt - trim down to 4.5" x 7"
Casing - 4 x 2.5" x 4"
S.A. = 3/8"

Saturday, September 15, 2012

Jenn - no peeking! SHOO!

I wanted to make some fun Thanksgiving and Halloween bibs, so I decided to make "sets" for some babies and toddlers I know :D   I ended up doing 6 sets (each with a Thanksgiving and a Halloween bib) - here are the Halloween bibs ...

... and the Thanksgiving ones :)


Remember my recent badly-scaled flex frame failure?  I rejigged, and this one worked out much better :D  The rounded sides are due to the camera angle - the bag is a bit straighter than it appears, LOL.

The inside is completely finished, with no raw edges.  I was using scraps for this bag but was about an inch short for this to be the right size for an eyeglass case - I'm already working on one that's a little bit longer, but no wider :)

Friday, September 14, 2012

The bat that morphed into a penguin :D

 The bat bag that is not, is now finished :)  I'm not very happy with the finishing techniques in the book - nothing is lined, and there are many raw edges.  The projects were designed to be quick and easy, so something had to give.  I'll be making modifications to any further projects - I really don't like such "rustic" completions.  I'm sure kids won't mind, but I do!


Check out his little feeties --- I added a bit of stuffing to his wing/fins, nose and feet - to make them cuter :)

A few more finishes - bird and flower boxy bags for Blue Hills ...
Canada boxy bags, also for Blue Hills ...
and some tall pouches.  I'm putting these in my gift box and will make name tag zipper pulls (Shrinky Dink!) when I gift them :)


Construction notes: here's a tutorial with instructions on how to line a round bottom drawstring bag - the Lucy-proof bag - I love that kitty! :D

Late for Work excuse of the day, LOL!

From Cheezburger:
My co-worker sent an email saying he would be late because he was trying to untie a squirrel tail knot. I asked for a picture, and he delivered.
Here's the email from said coworker:
I was pressed into squirrel rescue this morning on my way out. 5 young squirrels got tangled in Christmas lights in my neighbor's yard. We got the lights off, but now their tails are one big knot, so I have to bring them into a rescue place to untie them, as I am unequipped to untie squirrel tail knots. I should be in this afternoon.

Source :)
I hope the little guys are OK - I'm sure they are, though, since they were apparently on their way to the rescue place for tail detangling!  Now you know what mornings are like for those of us with curly hair, LOL! :)

Thursday, September 13, 2012

Check out my Halloween BAT bag!

What? You don't think it looks like a bat???!!  You say it looks like a PENGUIN?!??!?!  I don't think so ... oh wait ... wait just a minute!   You're right!  It *does* look like a penguin - I wonder how THAT happened??!

Oh I know.  It's because I had a major brain fart, wrote down Bat Bag in my list of things to do, pulled out fabrics, read through the directions and planned on a bat bag (a gift), and then ... proceeded to cut out and sew the penguin bag.   I would have done the penguin bag anyways, so I'll finish it and then do the bat bag, LOL.  To my credit, the instructions and photographs for that particular shape of bag, are all for the penguin bag.  The bat and other designs are added afterwards in a small section, with a small picture.  Even though my brain and eyes were saying bat, my fingers and sewing machine said penguin :D  And it's obvious who won :D

Blame NOT the book!  It's a wonderful book!  It's chock full of cute goodies, and in fact, the bat bag is on the front cover (a very small photo, mind you).  I plan on making more fast, fun & easy critter bags - hopefully next time I'll remember to engage my brain first, LOL!  


The BACON number!

If you add "Bacon number" (no quotes) to a Google search before (or after) you type an actor or actresses name, you'll get the degree of separation between them and Kevin Bacon.  Google is going to take over the world, with this kind of $hit, LOLOL!!!


Neil Patrick Harris' Bacon number = 1 :)
Angela Lansbury's Bacon number = 2 :)
Marilyn Monroe's Bacon number = 2 :)


Awesomesauce!!


Monday, September 10, 2012

I'm definitely getting back in the swing of things :)

Rainbow zipper bag - lined with red gingham - very kicky!  This was a project I had pinned, and finally got around to making last month :D

 Here are a couple of zipper bags I made using some pretty bird fabric that was gifted to me by Deb in Arizona - thanks Deb! 
And - last but not least, a tote bag set I finished today - I made the 2 zippies a while ago, and finally got the simple tote made today :)  All of the items in this post are going to Blue Hills :)


Saturday, September 8, 2012

iLearned - a lesson about scale :D

The lesson is - don't do this.  HA!!!  It looks WORSE in person - trust me!  I used a 3.5" flex frame but made the bag way a couple of inches wider, and that just doesn't work right.  I'll see if I can remove the flex frame and use a larger one :)

 Book tote - pattern by City House Studio (bought on Etsy) :)  Here's the front ...

... and here's the back :)  The tote is a Christmas gift, and will have some goodies tucked inside :D
 Simple "use up the last of this fabric" tote for Blue Hills :)

Here are a couple of zipper bag finishes - the bag on the right, made from construction fabric, will be tucked into the READ library tote as part of the gift :)

FABRIC AIRPLANES!!!  Can you imagine, lol - aren't these a hoot?  And so very easy to make!  These will be tucked inside the READ book tote too, as part of the gift!  I pinned this a while ago, and finally got around to doing it - tutorial here :) 

ETA:  The blogger and designer of the fabric airplanes dropped by to comment - hey Jen - thanks for the great idea and the tutorial - you ROCK! 


LinkWithin

Related Posts with Thumbnails